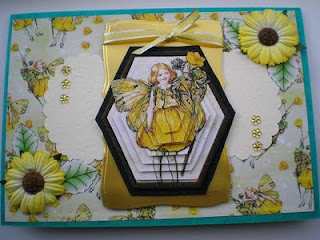
love the way this card has turned out nice and simple, the image is one that i got from an image swap on the crafters companion forum.Pages
background
Sunday, 9 August 2009
sketch challenge
Here is my sketch for this week
love the way this card has turned out nice and simple, the image is one that i got from an image swap on the crafters companion forum.
love the way this card has turned out nice and simple, the image is one that i got from an image swap on the crafters companion forum.lIve Crafting
There was another evening of live crafting over on crafters companion forum, Rachel was the hoist for this event, as I was was busy with my family and was not able to join in.
I managed to get it done early this morning, if you would like to follow along and make this card the instructions start HERE, Just scan down ubtil you find the first instructions and photos.
love the way this card has turned out, not seen this style before and enjoyed making it.
Thanks Rachel for stepping in.
love these paper and have used them a few times on other cards, the tags were cut using my cricut
ingreadents
Papers.. my minds eye, magnolia stack
peel offs.. papermaina
flowers.. prima
punch...woodware


I managed to get it done early this morning, if you would like to follow along and make this card the instructions start HERE, Just scan down ubtil you find the first instructions and photos.
Thanks Rachel for stepping in.
love these paper and have used them a few times on other cards, the tags were cut using my cricut
Papers.. my minds eye, magnolia stack
peel offs.. papermaina
flowers.. prima
punch...woodware


Tuesday, 4 August 2009
This weeks Sketch challenge
Monday, 3 August 2009
Crafters companion Challenge blog
Here is My DT card for our next challenge over on Crafters Companion Challenge blog, We have another popcorn stamp up for grabs if you want to join in details HERE
For this card I have used papers and toppers from crafters companion buttercup fairy CD, gem are from papermainia, flowers e bay
Friday, 31 July 2009
live crafting
We have had another evening of live crafting on the crafters companion forum, this is the card we have made
imgredents
Ruler
Pencil
Craft knife
12x12 card for base
Contrasting card if you are going to mat your pattern paper
2 A4 pattern papers
TopperEmbellishments
Step 1
Cut your mat or 1st pattern paper if not mating to 3 3/4 inches x 5 1/4 inches, make two, also cut a strip 1 ¾ x5 ¼ inches
Step 2
Cut second pattern paper to 3 ¾ x 2 ¼ inches.
Then cut 6 pieces measuring 1 ¾ x 1 ¼,
Then 1 more at 1 ¾ x 2 ¼
Card Base
Step 1
Take your 12x12 card and cut it so that it is 12 x 5 ½ wide.
Take your ruler and make small marks in pencil at both top and bottom of this strip at 4 inches 8 inches and 10 inches, score down these lines, so that it looks like this
Step 2
On the first score line (4 inch line) make a small mark at 1 ½ inches from the top, also at 1 ½ inches from the bottom, them go to the last score line (10 inch line) and do the same here.
Cut with a craft knife, join using these marks as guides on the long side from 4 inch score to 10 inch score, at the top and bottom
See photo
Step 3
So again take your ruler and make small marks at the top and bottom at 6 inches.
Now we are going to make more score marks but only on the top and bottom 1½-inch margins at 6 inches, so score from your small mark to the cut line on the top then again on the bottom
Step 4
Crease the folds so that the card look like this, it is a bit fiddly so look at photos

Step 5
Taking pattern paper 1 stick the one of the large pattern papers to the front, and the second large one to the inside
Take the last of paper 1 and stick on other end. As in photos
imgredents
Ruler
Pencil
Craft knife
12x12 card for base
Contrasting card if you are going to mat your pattern paper
2 A4 pattern papers
TopperEmbellishments
Step 1
Cut your mat or 1st pattern paper if not mating to 3 3/4 inches x 5 1/4 inches, make two, also cut a strip 1 ¾ x5 ¼ inches
Cut second pattern paper to 3 ¾ x 2 ¼ inches.
Then cut 6 pieces measuring 1 ¾ x 1 ¼,
Then 1 more at 1 ¾ x 2 ¼
Step 1
Take your 12x12 card and cut it so that it is 12 x 5 ½ wide.
Take your ruler and make small marks in pencil at both top and bottom of this strip at 4 inches 8 inches and 10 inches, score down these lines, so that it looks like this
On the first score line (4 inch line) make a small mark at 1 ½ inches from the top, also at 1 ½ inches from the bottom, them go to the last score line (10 inch line) and do the same here.
Cut with a craft knife, join using these marks as guides on the long side from 4 inch score to 10 inch score, at the top and bottom
See photo
So again take your ruler and make small marks at the top and bottom at 6 inches.
Now we are going to make more score marks but only on the top and bottom 1½-inch margins at 6 inches, so score from your small mark to the cut line on the top then again on the bottom
Crease the folds so that the card look like this, it is a bit fiddly so look at photos
Taking pattern paper 1 stick the one of the large pattern papers to the front, and the second large one to the inside
Take the last of paper 1 and stick on other end. As in photos
Tuesday, 28 July 2009
My New toy
Well here is a photo of whats come to live at my house, ordered it yesterday and came this afternoon, great service
So having a few hours getting it all set up to use Sure Cuts a Lot , i have managed to have a play. the first thing was the little bow and tag that you can see on the edge of the cutting mat in this photo
then I got the hang of it, and just had to do the baby's name for a scrapbook page that I am doing
So having a few hours getting it all set up to use Sure Cuts a Lot , i have managed to have a play. the first thing was the little bow and tag that you can see on the edge of the cutting mat in this photo
Subscribe to:
Posts (Atom)