Pages
background
Saturday, 30 August 2008
my sketch no 25
Saturday, 23 August 2008
Beach Bag
I have used a pearlescent card stock that has a weaved finish to it, this I used as my base card. I wanted the effect of one of those clear PVC see through bags, So i printed a design from my cute companions CD onto acetate, This I then used as a jacket over my base card, I then decorated the acetate Jacket with peel offs before adding the flap of the bag also decorated with peel offs and a chunky gold brad I then made an insert using the same design papers that I had printed onto the acetate
My Handbag TemplateTutorial
When cutting our the handle centre please keep safe you will need this later.
here is a view of the base card opened out
I then covered the front with backing paper, I found the easiest way to do this was to fold the A4 backing paper in half cover both the front and back edges with double sided tape, put the card into the centre of folded backing paper, then when open trim around the edges to get a nice even shape, then trim the centre handle out from inside the card.
I then went around all the edges with peel offs
This is where you need the centre piece that you saved earlier, go around the edges with peel offs, I then took some double sided tape and put a strip to the back straight edge, for the front rounded edge I used some 3D pads, when this is then added to the front of the bag it keep the back edge flat and raised the front rounded edge slightly, this then look as if the flap has been bent over the bag
To finish the bag as you can see in in the first photo I added some flowers to the corner, and a gold tassel with an extra large brad, to act as a large clasp to the front flap,
The template for this card is on the posting below
Handbag Template
Sketch no 24
I made the square image into a circle pyramage, I then layered this onto silver card with some nice punched out corners, I then stuck this to one side of the gate fold card, the backing papers came from bits of the image and me playing with the tile creator in 3D2. I love this function you can get loads of great backing papers, you can get a bit carried away and end up with way more papers than you will ever use
Thursday, 21 August 2008
Funky
Mini bag & display box
I them made the matching display box, again easy to follow instructions, but a bit fiddly when glueing, there is not much card on the sides to glue together as the box is very small, When I make this again I think I will make myself a deep box with my box maker and put acetate panels in both the top and bottom sections
Just to show you how small both the bag and the display box are I have taken a photo of them in front of an A 5 card, when finished they only come about half way up the card, but still very cute.
I might enlarge the bag pattern and make it a bit bigger next time
Monday, 18 August 2008
cupcake cards
Thanks to the designers of both templates, I will put links to each blog on the bottom of this posting
the first card I used Pink petticoats papers for the cupcakes paper case, I then took some pearlescent pink and mint card and ran it through my cuttlebug folders
The second cake is a bit smaller than the first, this time I used pink corrugated card for the paper case, Again as I had some of the embossed Pink and mint card left over I used as the icing. The third card was made the same way but just mint embossed card, on top of this I added some 3d paint and sprinkled a few bits of flower soft for the hundreds and thousands topping
Here are the three cards together, they look scrummy and good enough to eat, Only these wont go to your hips
here is were I got the templates from
the first and largest one came from
http://valitasfreshfolds.blogspot.com/2008/08/cupcakes-yummy-tutorial.html
the last two came from here
http://linseyrickett.blogspot.com/2008/04/cupcake-card.html
Sunday, 17 August 2008
Two more cards
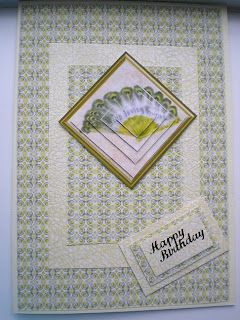
I took my image into the programme and made two decoupage toppers the first is a pyramid topper, I also made some backing paper to match, For these card I also used some of crafter`s companion embossed backing papers. I also made the tag using both papers and a peel off Happy Birthday
For the second I used a square card, I had made another topper to add to my printing out sheet, this time I made it as a traditional decoupage layered it up and added it to the centre of the card, this time I added some ribbon as I matted and layered the base card, again I made a happy Birthday topper for the bottom of the card
New Look to my blog
Thanks To Rachel and Jane who talked me into having a change of colours, well these are not colours more like lovely papers.
I love it
Saturday, 16 August 2008
Fan
Sketch card no 23
All the paper came from Shabby Princess They are in a lovely blue colour the photo does not do them justice
I matted and layered the papers onto silver mirri card following my design, i added 4 silver brads to the mat going across the page.
I then stamped some fans and embossed with silver embossing powders before mounting onto the centre panel with 3d pads
Sunday, 10 August 2008
Cute companions
I stamped my mice coloured them with watercolour pencils then I arranged them one in the window writing the other is kicking mums cotton around.
printed out a Happy Birthday from the same Cd, then arranged in a wave along the bottom of the card
Saturday, 9 August 2008
Double gatefold Pop up card
So I have had a go at it, and very pleased with the end result.
Thanks Rachel
The paper and the insert came from Crafters companion Florals Cd.(I pulled this one out of the cupboard this week, I had forgotten how much I liked some of the designs)
The butterfly was stamped then coloured with
H20.
I will finish it off by making a box using the same papers
I did enjoy making this card, and I am sure it will be a style that I will use again, It was quite simple to do and gives a stunning end result
Triangular Tri fold Card
The papers and topper came from Joanna sheens
Fashion Boutique cd, I also used one of her stamps for the mirror inside the card.
I still need to make a box and will be using more of the matching paper
My sketch challenge 22
Well this is sketch no 22 that I have done for the girls on Crafters Companion Forum, the weeks have flown by.
If anyone else would like to join in please leave a comment and I will come take a look
The paper I used for the card come from crafters companions floral Cd, I them added two mats that matched the main card, to this a added a bit of fake stitching, I them co,oured in a bella stamped image, mounted this onto mirri card then added prima flowers to finish
Rachels monthly challenge
Once A month Rachel sets the members of crafters companion forum a card challenge to do.
This month was a betty boop Christmas image.
I took the image into my 3D2cd and resized the Image . I them made a few backing papers.
I mounted two of the papers onto a large square card, added a peel off between the two papers. mounted my piramage onto gold card , popped it all onto the centre and added a Christmas greeting
Saturday, 2 August 2008
Wendy`s Sketch challenge 21
Watch the matting on this one it is not as straight forward as it seems, a little twist to keep you on your toes
I do like the end result with this card, the papers I used came from shabby princess, I just love all the blues in her moddy blues collection.
I have trimmed the papers to follow the pattern, the white mat I put through the cuttlebug, with the happy birthday folder, I then added 4 eyelets in two shades of blue( I have just treated myself to a crop a dial ,so just had to use it for this project, I love it)
the image comes from Sally Ann and coloured with oil pastels and blended with sansador, this was then mounted onto the embossed Mat.